Connect to Dashboard
After Dashboard is deployed, you can log in and use Dashboard on the browser.
Prerequisites
- The Dashboard services are started. For more information, see Deploy Dashboard.
- We recommend you use the Chrome browser of the version above 89. Otherwise, there may be compatibility issues.
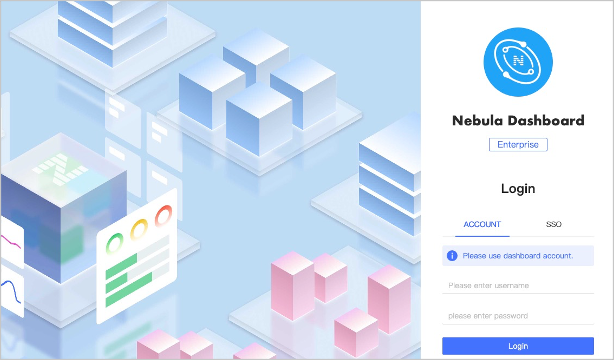
Connect to Dashboard
-
Confirm the IP address of the machine where the Dashboard is installed. Enter
http://<ip_address>:7005in the browser to open the login page.If the following login interface is shown in the browser, then you have successfully deployed and started Dashboard.
Note
When logging into the NebulaGraph Dashboard Enterprise Edition for the first time, the content of END USER LICENSE AGREEMENT is displayed on the login page. Please read it and then click I Agree.
-
Log into Dashboard with the default account name
nebulaand passwordnebula.Note
You can create LDAP, OAuth2.0, or general accounts after logging into Dashboard. For more information about the Dashboard account, see Authority Management.
Activate Dashboard
Before using Dashboard, it is necessary to configure License Manager (LM) to validate the effectiveness of the license and activate Dashboard.
Users can configure LM in two ways to use Dashboard:
-
Configure LM directly through Dashboard:
The dashboard currently supports visual one-click deployment of LM. After logging into Dashboard, follow the steps below to complete the deployment of LM and start using Dashboard.
-
Click Start on the LM Introduction page: This page introduces the relevant concepts and overall process of LM, including installation of LM, generation of License Key, and running LM. Click Start to continue.
-
Fill in the configuration information and install LM: You need to fill in the host IP, SSH-related information, installation path, License Manager port, etc. After filling in the information, click Install LM to install it.
-
View LMID and generate License Key: After successfully installing LM, LMID will be generated. Users can copy LMID and bind the LMID to generate a license key on LC. Users need to fill in the License Key in the Dashboard interface and click Confirm to complete the configuration of the License.
-
Note
If the user already has a License Key, then can click on the Configuration LM URL in the top right corner, enter the LM URL directly, and then click Confirm to complete the configuration of the License.
-
Configure LM through the installation package:
-
Install and start LM, and load the License Key in LM. For details, please refer to License Manager.
-
In the installation path of Dashboard, go to the
etcdirectory, and modify theconfig.yamlfile. Set the value ofLicenseManagerURLto the host IP and port number 9119 where LM is located, for example,192.168.8.xxx:9119. Users can also log into Dashboard and set the value ofLicenseManagerURLin the License Manager Installation Guide page under Configuration LM URL.
-