Import data
Studio supports importing data in CSV format into NebulaGraph through an interface.
Prerequisites
To batch import data, do a check of these:
- The schema has been created in NebulaGraph.
- The CSV files meet the demands of the schema.
- The account has GOD, ADMIN, or DBA permissions. For details, see Built-in Roles.
Entry
In the top navigation bar, click  .
.
Importing data is divided into 2 parts, creating a new data source and creating an import task, which will be described in detail next.
Create a new data source
Click New Data Source in the upper right corner of the page to set the data source and its related settings. Currently, 3 types of data sources are supported.
| Type of data source | Description |
|---|---|
| Cloud storage | Add cloud storage as the CSV file source, which only supports cloud services compatible with the Amazon S3 interface. |
| SFTP | Add SFTP as the CSV file source. |
| Local file | Upload a local CSV file. The file size can not exceed 200 MB, please put the files exceeding the limit into other types of data sources. |
Note
- When uploading a local CSV file, you can select more than one CSV file at one time.
- After adding a data source, you can click Data Source Management at the top of the page and switch tabs to view the details of different types of data sources, and you can also edit or delete data sources.
Create an import task
-
Click New Import at the top left corner of the page to complete the following settings:
Caution
Users can also click Import Template to download the sample configuration file
example.yaml, configure it and then upload the configuration file. Configure in the same way as NebulaGraph Importer.- Space: The name of the graph space where the data needs to be imported.
- Task Name: automatically generated by default, can be modified.
- (optional)More configuration: You can customize the concurrency, batch size, retry times, read concurrency, and import concurrency.
-
Map Tags:
- Click Add Tag, and then select the tag within the added tags below.
- Click Add source file, select Data Source Type and File Path in Data source file, find the file you need to import, and then click Add.
- In the preview page, set the file separator and whether to carry the table header, and then click Confirm.
- Select the corresponding column for VID in VID Columns. You can select multiple columns to be merged into a VID, and you can also add a prefix or suffix to the VID.
- Select the corresponding column for the attribute in the properties box. For properties that can be
NULLor haveDEFAULTset, you can leave the corresponding column unspecified. - Repeat steps 2 to 5 to import all the data files of the Tag selected.
- Repeat steps 1 to 6 to import all Tag data.
- Map Edges: Same operation as map tags.
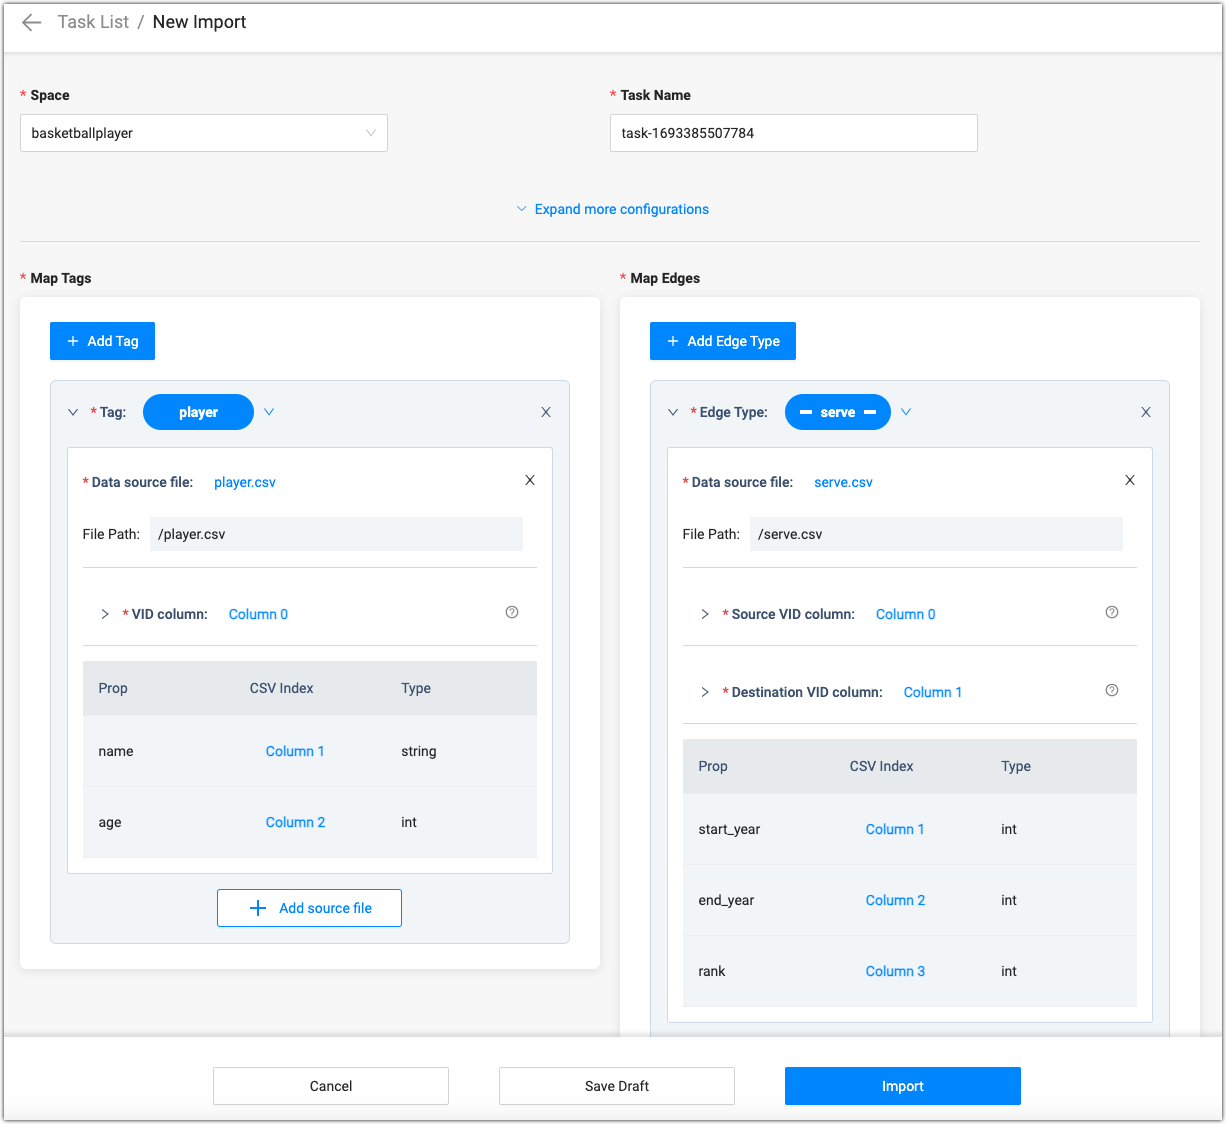
-
After completing the settings, click Import, enter the password for the NebulaGraph account, and confirm.
After the import task is created, you can view the progress of the import task in the Import Data tab, which supports operations such as filtering tasks based on graph space, editing the task, viewing logs, downloading logs, reimporting, downloading configuration files, and deleting tasks.
Next
After completing the data import, users can access the Console page.