Manage tags
After a graph space is created in NebulaGraph, you can create tags. With Studio, you can use the Console page or the Schema page to create, retrieve, update, or delete tags. This topic introduces how to use the Schema page to operate tags in a graph space only.
Prerequisites
To operate a tag on the Schema page of Studio, you must do a check of these:
- Studio is connected to NebulaGraph.
- A graph space is created.
- Your account has the authority of GOD, ADMIN, or DBA.
Create a tag
-
In the toolbar, click the Schema tab.
-
In the Graph Space List page, find a graph space and then click its name or click Schema in the Operations column.
-
In the Current Graph Space field, confirm the name of the graph space. If necessary, you can choose another name to change the graph space.
-
Click the Tag tab and click the + Create button.
-
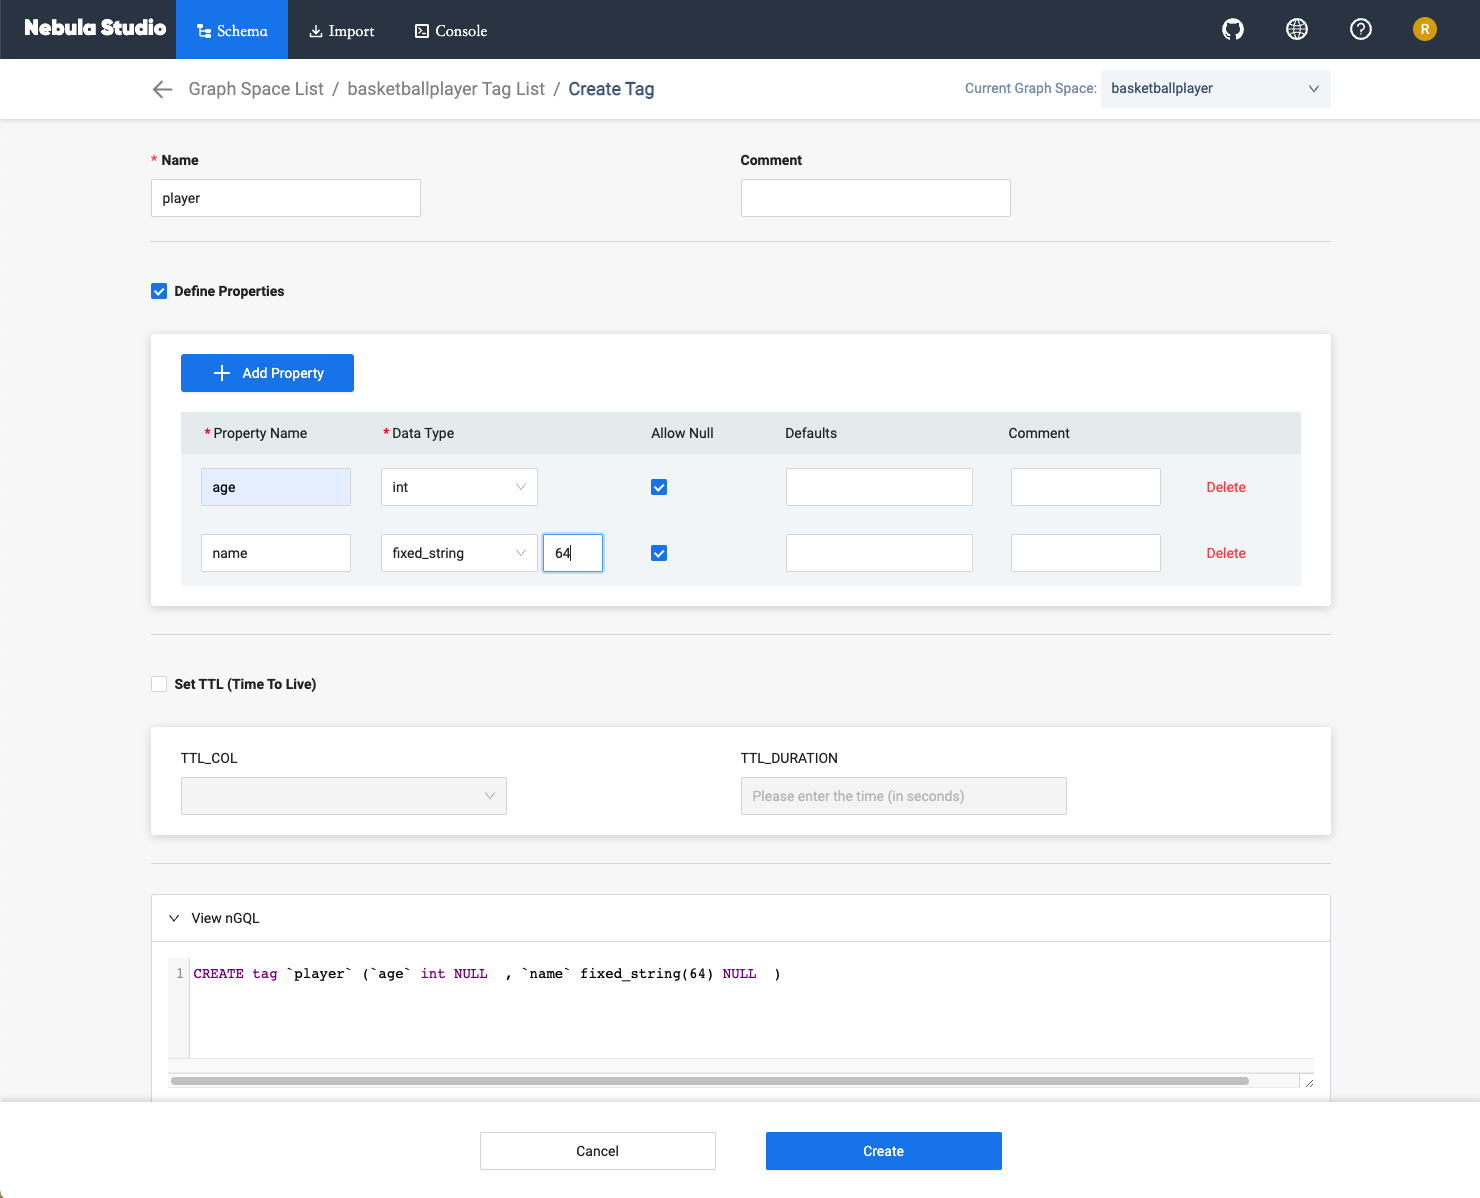
On the Create page, do these settings:
- Name: Specify an appropriate name for the tag. In this example,
courseis specified.
- Comment (Optional): Enter the description for tag.
-
Define Properties (Optional): If necessary, click + Add Property to do these settings:
- Enter a property name.
- Select a data type.
- Select whether to allow null values..
- (Optional) Enter the default value.
- (Optional) Enter the description.
- Set TTL (Time To Live) (Optional): If no index is set for the tag, you can set the TTL configuration: In the upper left corner of the Set TTL panel, click the check box to expand the panel, and configure
TTL_COLandTTL_ DURATION(in seconds). For more information about both parameters, see TTL configuration.
- Name: Specify an appropriate name for the tag. In this example,
-
When the preceding settings are completed, in the Equivalent to the following nGQL statement panel, you can see the nGQL statement equivalent to these settings.
-
Confirm the settings and then click the + Create button.
When the tag is created successfully, the Define Properties panel shows all its properties on the list.
Edit a tag
-
In the toolbar, click the Schema tab.
-
In the Graph Space List page, find a graph space and then click its name or click Schema in the Operations column.
-
In the Current Graph Space field, confirm the name of the graph space. If necessary, you can choose another name to change the graph space.
-
Click the Tag tab, find a tag and then click the button
 in the Operations column.
 -
On the Edit page, do these operations:
- To edit a Comment: Click Edit on the right of
Comment.
- To edit a property: On the Define Properties panel, find a property, click Edit, and then change the data type or the default value.
- To delete a property: On the Define Properties panel, find a property, click Delete.
- To add more properties: On the Define Properties panel, click the Add Property button to add a new property.
- To set the TTL configuration: In the upper left corner of the Set TTL panel, click the check box and then set TTL.
- To delete the TTL configuration: When the Set TTL panel is expanded, in the upper left corner of the panel, click the check box to delete the configuration.
-
To edit the TTL configuration: On the Set TTL panel, click Edit and then change the configuration of
TTL_COLandTTL_DURATION(in seconds).Note
For the problem of the coexistence of TTL and index, see TTL.
- To edit a Comment: Click Edit on the right of
Delete a tag
Danger
Confirm the impact before deleting the tag. The deleted data cannot be restored if it is not backup.
-
In the toolbar, click the Schema tab.
-
In the Graph Space List page, find a graph space and then click its name or click Schema in the Operations column.
-
In the Current Graph Space field, confirm the name of the graph space. If necessary, you can choose another name to change the graph space.
-
Click the Tag tab, find an tag and then click the button
 in the Operations column.
 -
Click OK to confirm delete a tag in the pop-up dialog box.
Next to do
After the tag is created, you can use the Console page to insert vertex data one by one manually or use the Import page to bulk import vertex data.