Deploy Explorer
This topic describes how to deploy Explorer locally by RPM, DEB and tar packages.
Precautions
The Dag Controller installation package is built in Explorer starting from version 3.2.0, which provides graph computing services. The user can decide whether or not to start the Dag Controller service. If the Dag Controller service is not started, the Workflow menu in Explorer will appear gray and cannot be clicked.
Prerequisites
Before deploying Explorer, you must check the following information:
- The NebulaGraph services are deployed and started. For more information, see NebulaGraph Database Manual.
-
Before the installation starts, the following ports are not occupied.
Port Description 7002 Web service provided by Explorer Caution
By default, Explorer uses the port
7002. You can modify thehttpportin theconf/app.conffile in the installation directory and restart the service.
- The Linux distribution is CentOS.
-
The license is ready.
Enterpriseonly
License is only available in the Enterprise Edition. To obtain the license, apply for NebulaGraph Explorer Free Trial.
-
The HDFS services are deployed if graph computing is required. The namenode uses port 8020 by default, and the datanode uses port 50010 by default.
Caution
If the HDFS port is unavailable, the connection timeout message may be displayed.
RPM-based deployment
Installation
-
Select and download the RPM package according to your needs. It is recommended to select the latest version.
Enterpriseonly
You can apply online for Explorer free trial. Contact us to purchase. For features of Explorer, see Pricing.
-
Use
sudo rpm -i <rpm>to install RPM package.For example, use the following command to install Explorer. The default installation path is
/usr/local/nebula-explorer.sudo rpm -i nebula-explorer-<version>.x86_64.rpmYou can also install it to the specified path using the following command:
sudo rpm -i nebula-explorer-<version>.x86_64.rpm --prefix=<path> -
Copy the license to the installation path.
sudo cp -r <license> <explorer_path>For example:
sudo cp -r nebula.license /usr/local/nebula-explorer -
(Optional) Configure the Dag Controller. See the Configure Dag Controller section below.
-
Enter the folder
nebula-explorer, start the service using the following command.cd nebula-explorer # Start Explorer. sudo ./scripts/start.sh # (Optional) Start Dag Controller. sudo ./dag-ctrl/scripts/start.sh
Start and stop
You can use SystemCTL to start and stop the service.
systemctl status nebula-explorer #Check the status
systemctl stop nebula-explorer #Stop the service
systemctl start nebula-explorer #Start the service
You can also start or stop the service manually using the following command in the installation directory.
sudo ./scripts/start.sh #Start Explorer
sudo ./scripts/stop.sh #Stop Explorer
sudo ./dag-ctrl/scripts/start.sh #Start Dag Controller
sudo ./dag-ctrl/scripts/stop.sh #Stop Dag Controller
Uninstallation
You can uninstall Explorer using the following command:
sudo rpm -e nebula-graph-explorer-<version>.x86_64
DEB-based deployment
Installation
-
Select and download the RPM package according to your needs. It is recommended to select the latest version. Common links are as follows:
Enterpriseonly
You can apply online for Explorer free trial. Contact us to purchase. For features of Explorer, see Pricing.
-
Run
sudo dpkg -i <package_name>to unpack the DEB package.For example, run the following command to install Explorer (The default installation path is
/usr/local/nebula-explorer).sudo dpkg -i nebula-explorer-3.2.1.x86_64.debNote
You cannot customize the installation path of Explorer when installing a DEB package.
-
Copy the license to the Explorer installation path.
Sudo cp -r <license> <explorer_path>For example:
Sudo cp -r nebula.license /usr/local/nebula-explorer -
(Optional) Configure the Dag Controller. See the Configure Dag Controller section below.
-
Enter the folder
nebula-explorer, start the service using the following command.bash cd nebula-explorer # Start Explorer. sudo ./lib/start.sh # (Optional) Start Dag Controller. sudo ./dag-ctrl/scripts/start.sh
View the status
sudo systemctl status nebula-explorer.service
Stop the service
sudo systemctl stop nebula-explorer.service
Uninstallation
Run the following command to uninstall Explorer:
sudo dpkg -r nebula-explorer
TAR-based deployment
Installation
-
Select and download the TAR package according to your needs. It is recommended to select the latest version. Common links are as follows:
Enterpriseonly
Explorer is only available in the Enterprise Edition. Click Pricing to see more.
-
Use
tar -xvfto decompress the TAR package.tar -xvf nebula-explorer-<version>.tar.gz -
Copy the license to the
nebula-explorerdirectory.cp -r <license> <explorer_path>For example:
cp -r nebula.license /usr/local/nebula-explorer -
(Optional) Configure the Dag Controller. See the Configure Dag Controller section below.
-
Enter the folder
nebula-explorer, start the service using the following command.cd nebula-explorer # Start Explorer and Dag Controller. sudo ./scripts/start.sh # Start Explorer separately. sudo nohup ./nebula-explorer-server > explorer.log 2>&1 &
Stop Service
You can use kill pid to stop the service.
kill $(lsof -t -i :7002)
Configure Dag Controller
Dag Controller is a task scheduling tool that can schedule the jobs which type is DAG (directed acyclic graph). The job consists of multiple tasks to form a directed acyclic graph, and there is a dependency between the tasks.
The Dag Controller can perform complex graph computing with NebulaGraph Analytics. For example, the Dag Controller sends an algorithm request to NebulaGraph Analytics, which saves the result to NebulaGraph or HDFS. The Dag Controller then takes the result as input to the next algorithmic task to create a new task.
Steps
-
Complete the SSH password-free configurations so that the Dag Controller machine can log directly into the NebulaGraph Analytics machines and all machines within the NebulaGraph Analytics cluster can connect directly to each other without passwords.
For example, the user in the machine A (Dag Controller) log directly into machine B-1 in the NebulaGraph Analytics cluster over SSH without passwords. Run the following commands on the machine A:
//Press Enter to execute the default option to generate the key.
ssh-keygen -t rsa

//After the public key file of machine A is installed to the user of the machine B-1, you can log into the machine B-1 from the machine A without passwords.
ssh-copy-id -i ~/.ssh/id_rsa.pub <B_user>@<B_IP>
In the same way, complete the SSH password-free configurations so that the user in the machine A can log directly into the machine B-2, B-3, etc. and all machines within the NebulaGraph Analytics cluster can connect directly to each other without passwords.
-
Run
eval $(ssh-agent)on the Dag Controller machine to start the ssh-agent, then runssh-add ~/.ssh/id_rsato give the private key to the ssh-agent to manage.Note
ssh-agent is a key manager that manages multiple keys and provides proxies for other programs that need to use SSH key pairs.
-
Configure the username and port of the NebulaGraph Analytics in the file
dag-ctrl-api.yaml, the file path isdag-ctrl/etc/dag-ctrl-api.yaml. If there are multiple machines, ensure that the usernames and ports are the same.# configuration name. Name: task-api Host: 0.0.0.0 # The IP address of Dag Controller. Port: 9002 # The port of Dag Controller. Timeout: 60000 # he timeout duration of HTTP interface requests. Log: # The parameters related to log printing. For more Information, see https://go-zero.dev/cn/docs/blog/tool/logx/ Mode: file # The log printing method KeepDays: 7 # The maximum number of days to keep logs Path: logs # The output path of the log file Level: info # The log printing level Compress: false # Whether the log needs to be compressed # The user name and SSH port of the NebulaGraph Analytics machine. SSH: UserName: vesoft Port: 22 # The parallel thread pool sizes of the tasks and jobs. JobPool: Sleep: 3 # Check every 3 seconds for any outstanding jobs. Size: 3 # Up to 3 jobs can be executed in parallel. TaskPool: CheckStatusSleep: 1 # Check the task status every second. Size: 10 # Up to 10 tasks can be executed in parallel. Dag: VarDataListMaxSize: 100 # If HDFS columns are read, the number is limited to 100 at a time. # Other Debug: Enable: false # Whether to enable Debugging. # The key for the Explorer to communicate with the Dag Controller. No modification is required. RsaPriKey: | -----BEGIN RSA PRIVATE KEY----- MIICXAIBAAKBgQDcR0keIMmmV... -----END RSA PRIVATE KEY----- RsaPubKey: | -----BEGIN RSA PUBLIC KEY----- MIGJAoGBANxHSR4gyaZX7uet7... -----END RSA PUBLIC KEY----- -
Configure the algorithm file path (
exec_file) only in the filetasks.yaml, the file path of which isdag-ctrl/etc/tasks.yaml. Currently, allexec_fileparameters are set to the path of therun_algo.shfile.Note
- The algorithm files are provided by NebulaGraph Analytics. Please find the
scriptsdirectory under the installation path of NebulaGraph Analytics above. All algorithm files are in this directory. - If there are multiple machines, ensure that the algorithm file paths are the same.
- The other parameters are the execution parameters of the algorithms and are configured later on the visual workflow page.
exec_file: /home/xxx/nebula-analytics/scripts/run_algo.sh - The algorithm files are provided by NebulaGraph Analytics. Please find the
Next to do
When Explorer is started, use http://<ip_address>:7002 to get access to Explorer.
The following login page shows that Explorer is successfully connected to NebulaGraph.
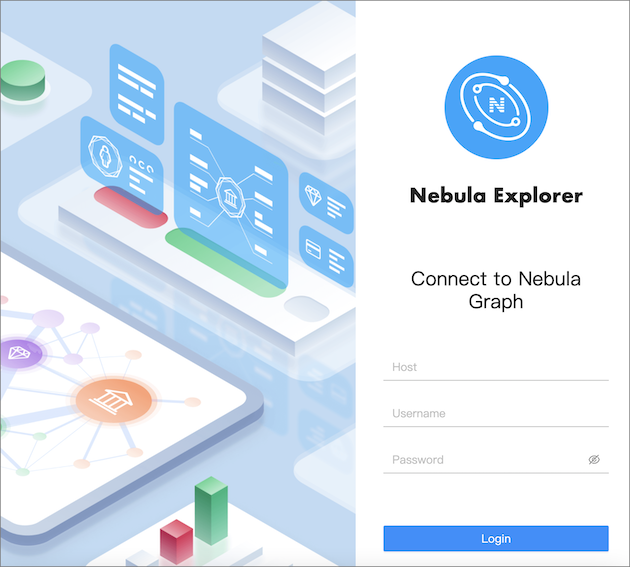
Note
When logging into NebulaGraph Explorer for the first time, the content of END USER LICENSE AGREEMENT is displayed on the login page. Please read it and then click I agree.
After entering the Explorer login interface, you need to connect to NebulaGraph. For more information, refer to Connecting to the NebulaGraph.