Import clusters
This topic introduces how to import clusters using Dashboard. The current version only supports importing clusters deployed by the official DEB or RPM packages and clusters created by Dashboard. Currently, importing clusters deployed by Docker and Kubernetes is not supported.
Steps
Caution
In the same cluster, the service versions need to be unified. Importing NebulaGraph examples from different versions in the same cluster is not supported.
-
In the configuration files of each service, change the IP in
<meta|graph|storage>_server_addrsandlocal_ipto the server's IP, and then start NebulaGraph.For details, see Configurations and Manage NebulaGraph services.
-
On the Cluster management page, click Import cluster.
-
On the Import cluster page, enter the information of Connect to NebulaGraph.
- Graphd Host:
:n . In this example, the IP is 192.168.8.157:9669. - Username: The account to connect to NebulaGraph. In this example, the username is
vesoft. - Password: The password to connect to NebulaGraph. In this example, the password is
nebula.
Note
By default, authentication is disabled in NebulaGraph. Therefore, you can use
rootas the username and any password to connect to NebulaGraph. When authentication is enabled in NebulaGraph, you need to use the specified username and password to connect to NebulaGraph. For details of authentication, see NebulaGraph manual. - Graphd Host:
-
On the NebulaGraph connection panel, fill in the following:
-
Enter the cluster name, 15 characters at most. In this example, the cluster name is
create_1027, and choose whether to usesudoto connect to the cluster.Notice
If your SSH account does not have permission for the NebulaGraph cluster, you can use
sudoto connect to it.
-
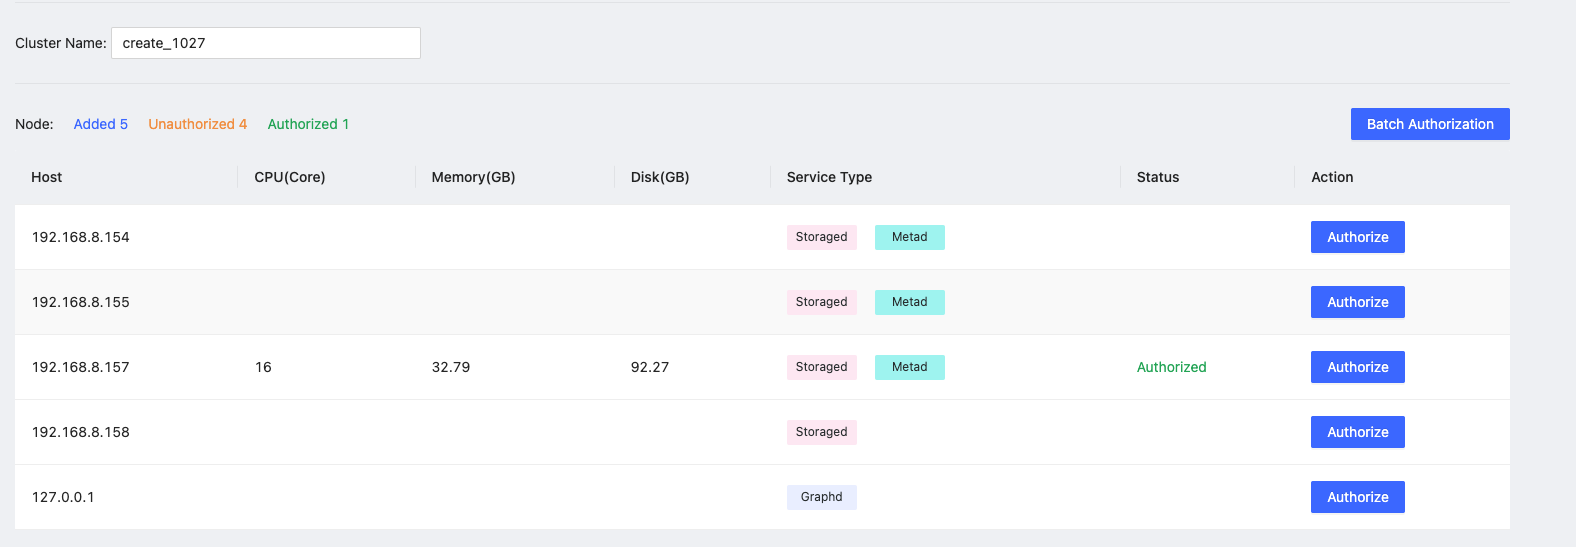
Authorize the node. The SSH username and password of each node are required, and choose to run
sudoor not.Notice
If your SSH account has no permission to operate NebulaGraph, but can execute
sudocommands without password, set use sudo to yes.
- Batch authorization requires uploading the CSV file. Edit the authentication information of each node according to the downloaded CSV file. Ensure that the node information is correct, otherwise upload failure may happen.
-
If the node status on the page becomes authorized, the node authentication is successful.
-
-
Ensure that all nodes are authorized successfully. Click Import cluster.
Next to do
After the cluster is successfully imported, you can operate the cluster. For details, see Overview.