Import data
After CSV files of data and a schema are created, you can use the Import page to batch import vertex and edge data into NebulaGraph for graph exploration and data analysis.
Prerequisites
To batch import data, do a check of these:
- Studio is connected to NebulaGraph.
- A schema is created.
- CSV files meet the demands of the Schema.
- Your account has privilege of GOD, ADMIN, DBA, or USER.
Procedure
Before importing data, you need to upload the file first and then create the import task.
Upload files
To upload files, follow these steps:
-
In the toolbar, click the Import tab.
-
On the Upload Files page, click the Upload Files button and then choose CSV files. In this example,
edge_serve.csv,edge_follow.csv,vertex_player.csv, andvertex_team.csvare chosen.Note
You can choose multiple CSV files at the same time. The CSV file used in this article can be downloaded in the Design a schema.
-
After uploading, you can click the
 button in the Operations column to preview the file content, or click the
  button to delete the uploaded file.
Import Data
To batch import data, follow these steps:
-
In the toolbar, click the Import tab.
-
In Import tab, click the Import Data.
-
On the Import Data page, click + New Import button to complete these operations:
Caution
users can click Import Template to download the example configuration file
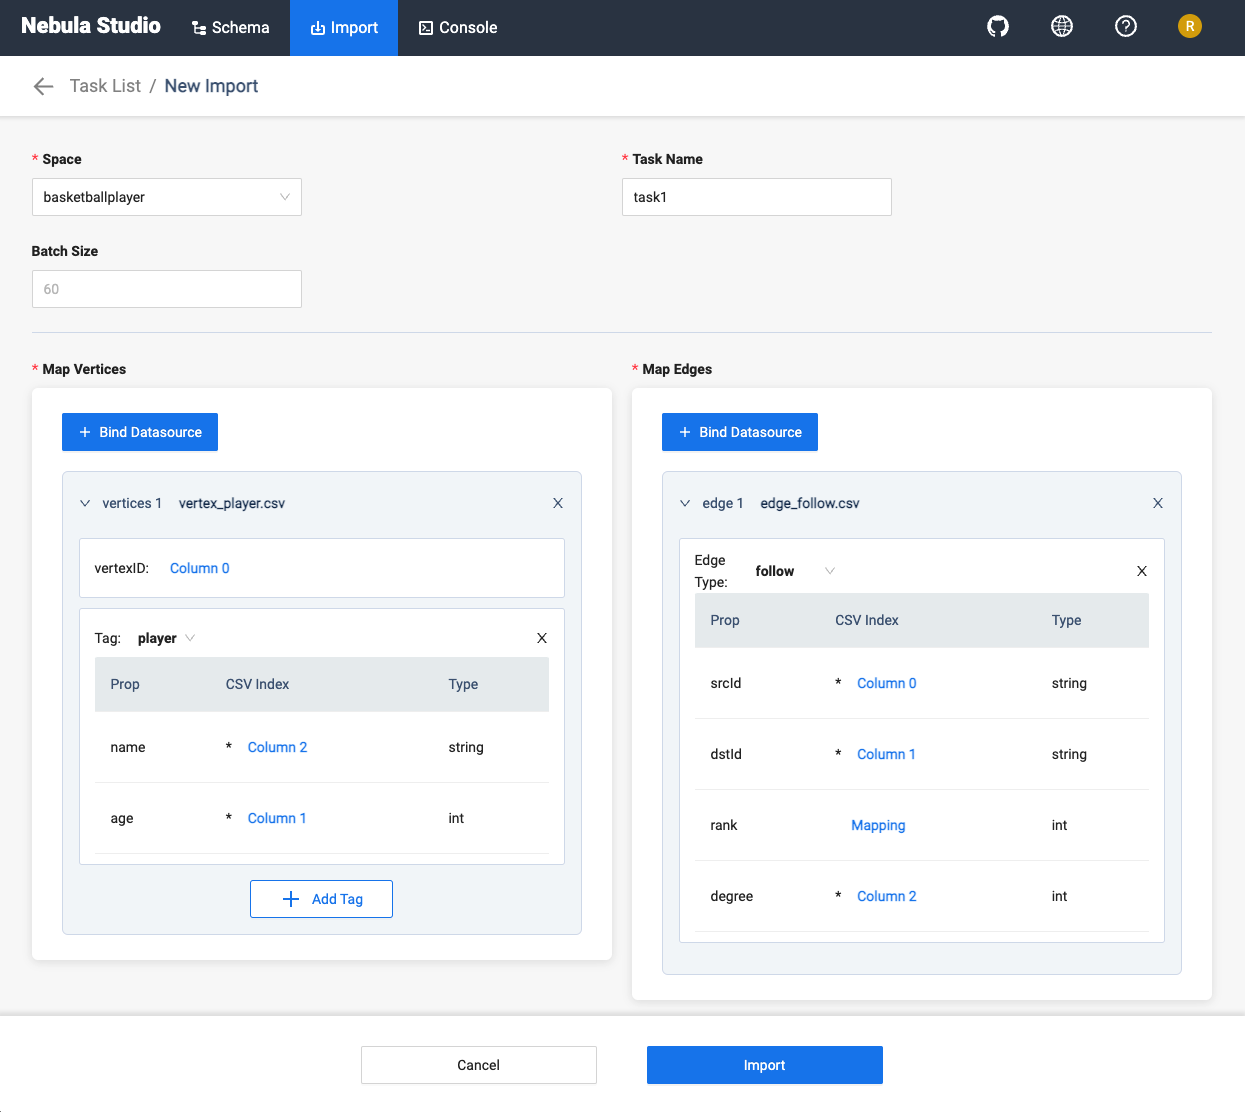
example.yaml, and upload the configuration file after configuration. The configuration mode is similar to that of NebulaGraph Importer, but all file paths for configuration files in the template retain the filename only. And make sure all CSV data files are uploaded before importing the YAML file.- Select a graph space.
- Fill in the task name.
- (Optional) Fill in the batch size.
- In the Map Vertices section, click the + Bind Datasource button, select bind source file in the dialog box, and click the Confirm button, the
vertex_player.csvfile is chosen.- In the vertices 1 drop-down list, click Select CSV Index, and select the column where vertexID is located in the pop-up dialog box.
- Click the + Add Tag button and click the
 icon on the right. In the displayed property list, bind the source data for the tag property. In this example, player is used for the
 vertex_player.csvfile. For the player tag, choose Column 1 for the age property, and choose Column 2 for the name property.
-
In the Map Edges section, click the + Bind Datasource button, select bind source file in the dialog box, and click the Confirm button, the
edge_follow.csvfile is chosen.- In the vertices 1 drop-down list, click Select Edge Type. In this example, follow is chosen.
- Based on the edge type property, select the corresponding data column from the
edge_follow.csvfile. srcId and dstId are the VIDs of the source vertex and destination vertex of an edge. In this example, srcId must be set to the VIDs of the player and dstId must be set to the VIDs of another player. Rank is optional.
-
After completing the settings, click the Import button.
-
You need to enter the password of your NebulaGraph account before importing data.

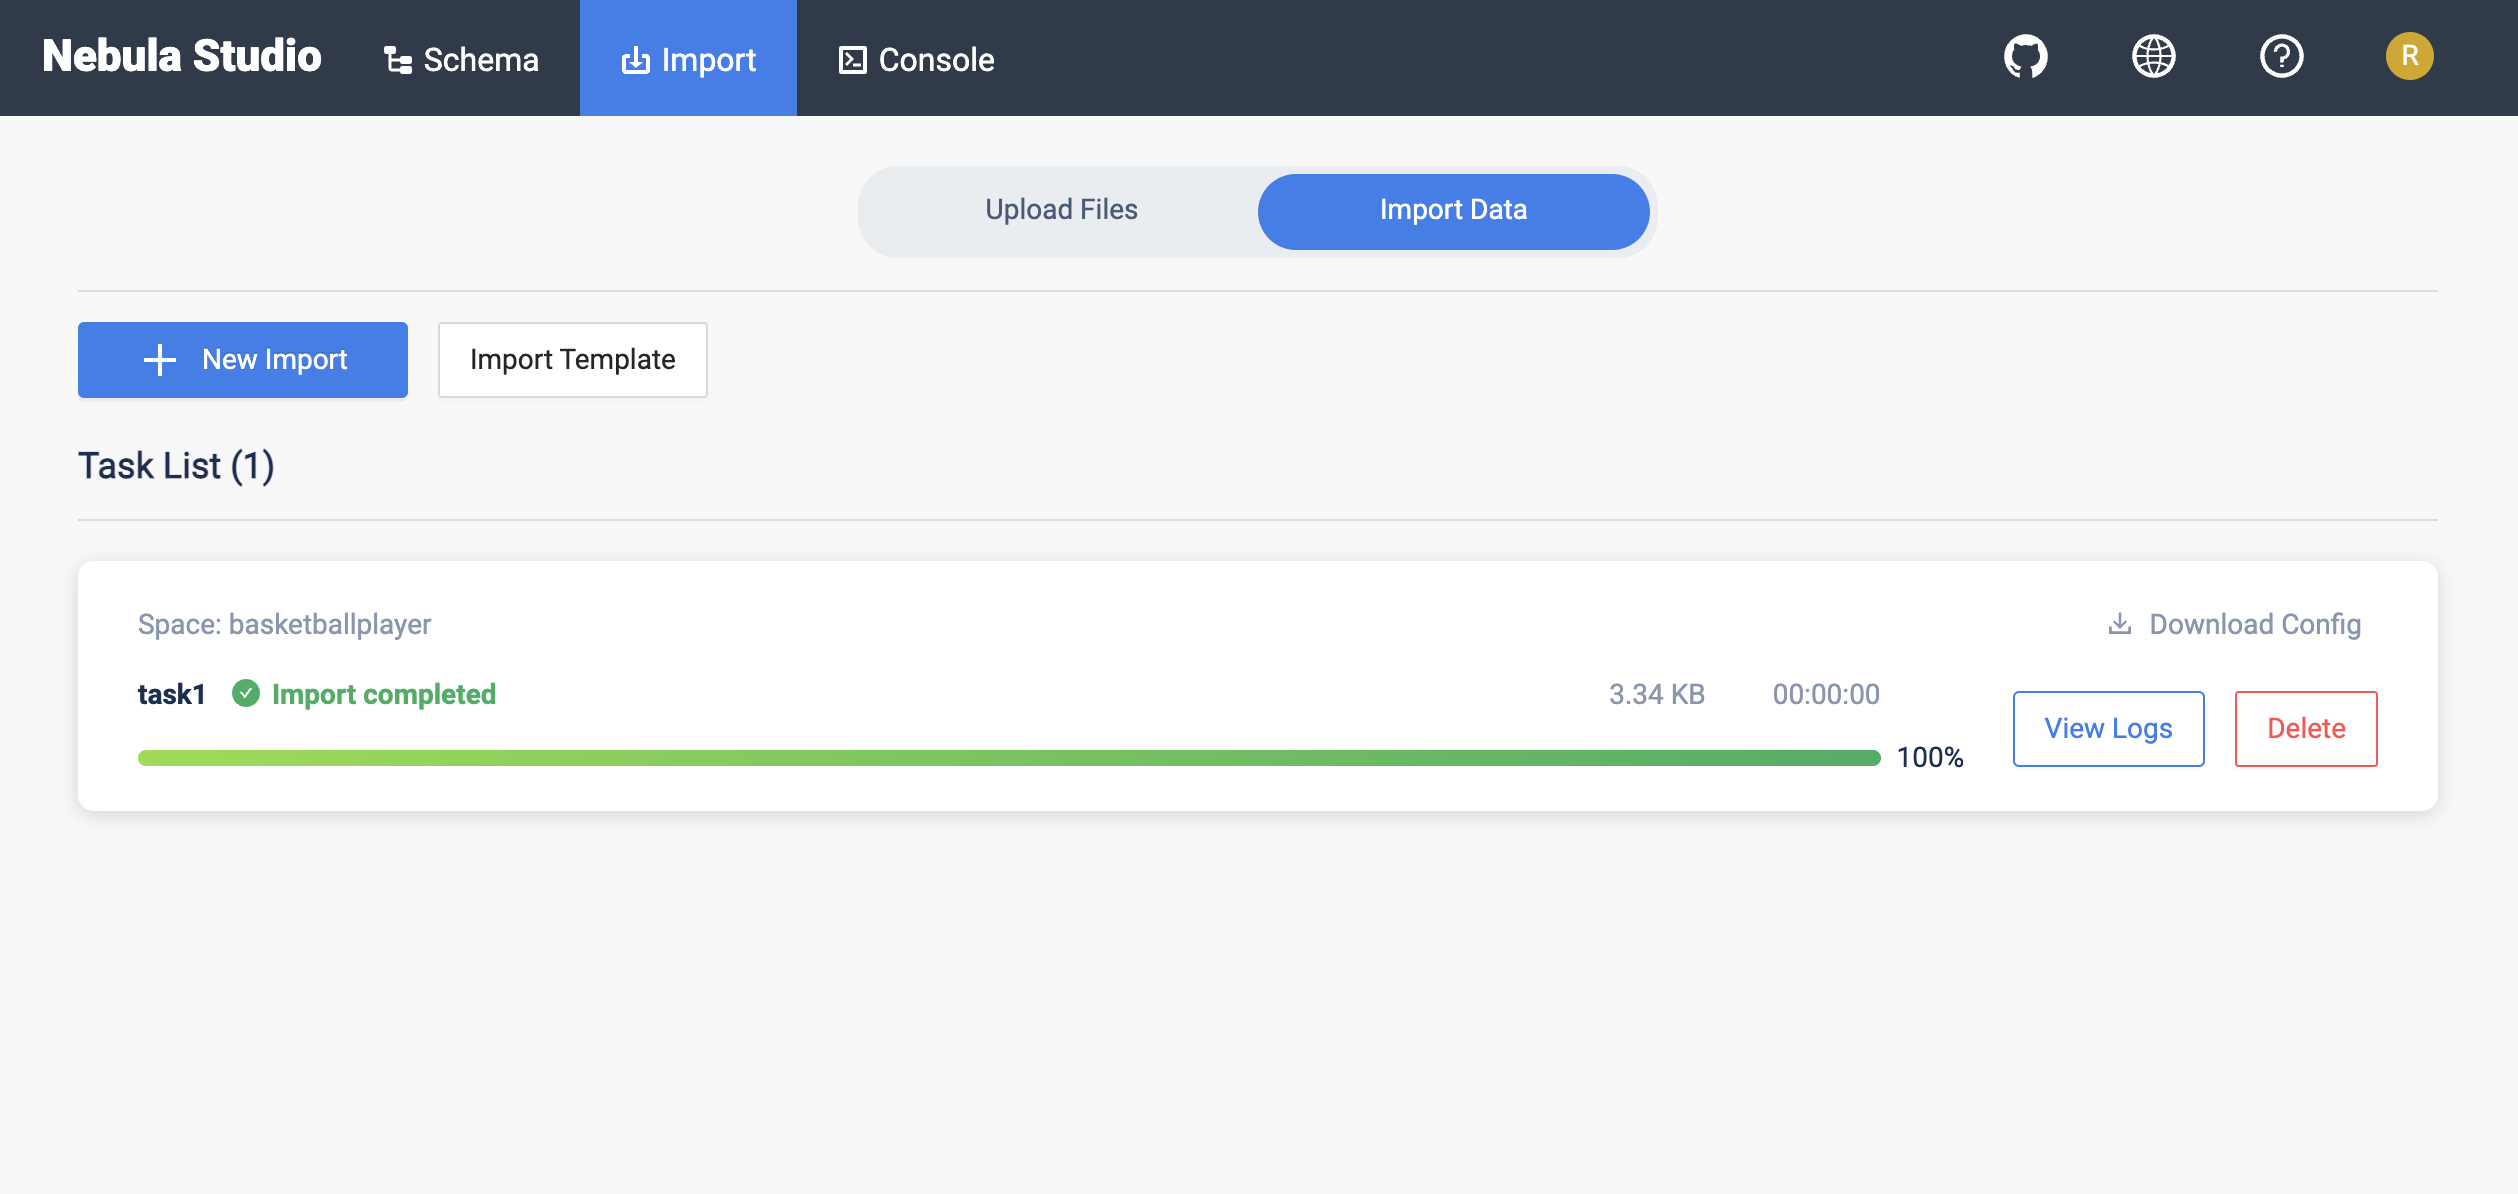
-
After importing data, you can view logs, download logs, download configuration files, and delete tasks on the Import Data tab.