Create clusters
This topic introduces how to create clusters using Dashboard.
Steps
You can create a cluster following these steps:
- At the top of the Dashboard page, click the Cluster Management button.
- On the Cluster management page, click Create cluster.
-
On the Create cluster page, fill in the following:
- Enter a Cluster Name, up to 15 characters for each name.
-
Choose a NebulaGraph version to install.
Note
Only one Enterprise Edition of NebulaGraph is provided for you to choose from on the Create cluster page. To install other versions of NebulaGraph, you can download or upload the corresponding installer package on the Package Management page. For details, see Package management.
-
Click Upload License.
Note
For the creation of a Community version of NebulaGraph, skip this step to upload the License file.
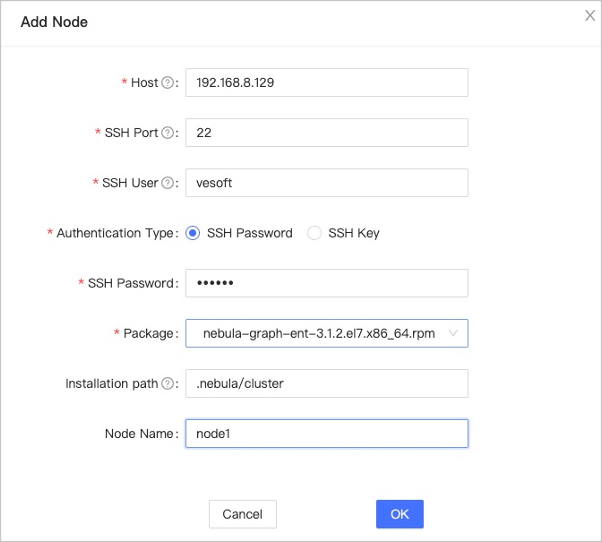
-
Add nodes. Enter the following information, the Host, SSH port, SSH user, authentication type, NebulaGraph package, etc.
The authentication type is described as follows:
- SSH Password: Enter the password of the SSH user.
- SSH Key: Click Upload and select the private key file of the node. You need to generate the secret key files on the node to be added and send the private key file to the current computer (not the machine where Dashboard is deployed). If the passphrase is set, this parameter is also required.
- Import nodes in batches. The information of each node is required. To import nodes in batches, you need to choose the installation package and click download the CSV template. Fill in the template and upload it. Ensure that the node is correct, otherwise, upload failure may happen.
-
Select the node and add the service you need in the upper right corner. To create a cluster, you need to add 3 types of services to the node. If not familiar with the NebulaGraph architecture, click Auto add service.

-
(Optional) Edit the port and HTTP port of the meta, graph, and storage services, and then click OK.
-
Click Create Cluster. Make sure the configuration is correct and there is no conflict between nodes, and then click Confirm.
-
If a cluster with the status of
installingappears in the list on the cluster management page, you need to wait for 3 to 10 minutes until the status changes tohealthy, that is, the cluster is created successfully. If the service status isunhealthy, it means that there is an abnormal service in the cluster, click Detail for more information.
Next to do
After the cluster is successfully created, you can operate on the cluster. For details, see Cluster operations.