Authority management
You can log into NebulaGraph Dashboard Enterprise Edition with different types of accounts. Different accounts have different permissions. This article introduces account types, roles, and permissions.
Account types
Once you log into Dashboard Enterprise Edition using the initialized account name nebula and password nebula, you can create different types of accounts: LDAP accounts and general accounts.
LDAP accounts
Dashboard Enterprise Edition enables you to log into it with your enterprise account by accessing LDAP (Lightweight Directory Access Protocol).
Before using an LDAP account, LDAP configurations are required.
- In the Dashboard Enterprise Edition installation path, such as
nebula-graph-dashboard-ent/nebula-dashboard-ent/config, find the configuration fileconfig.yaml. -
In
config.yaml, add the following content.ldap: server: ldap://127.0.0.1 bindDN: cn=admin,dc=vesoft,dc=com bindPassword: "" baseDN: dc=vesoft,dc=com userFilter: "&(objectClass=*)" emailKey: mailParameter Description server The LDAP server address. bindDN The LDAP login username. bindPassword The LDAP login password. baseDN Set the path to query user data. userFilter Set a filter to LDAP search queries. emailKey Set the field name used to restore email in LDAP. -
Restart Dashboard Enterprise Edition to apply changes.
After the LDAP is configured successfully, and use the initialized account name nebula and password nebula to log into Dashboard Enterprise Edition, you can create an LDAP account then. For information about how to create an account, see Create accounts.
General accounts
All accounts are general accounts except for LDAP accounts.
Account roles
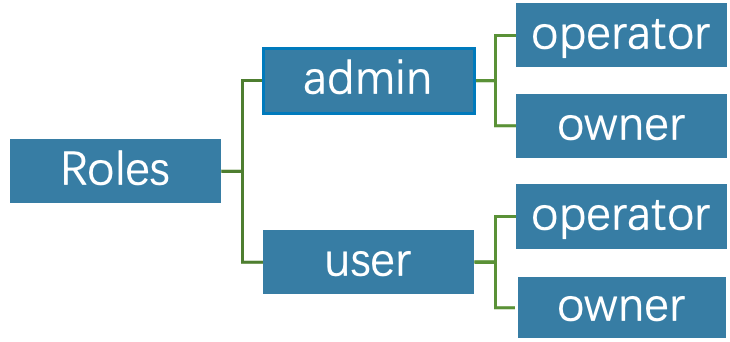
You can set different roles for your accounts. Roles are different in permissions. There are two types of account roles in Dashboard Enterprise Edition: system roles (admin and user) and cluster roles (owner and operator).
The relationship between system roles and cluster roles and their descriptions are as follows.
System roles:
| Roles | Permission | Description |
|---|---|---|
| admin | 1. Create accounts. 2. Modify the role of an existing account. 3. Perform platform settings, system-level alert settings. 4. Delete accounts. |
1. There can be multiple admin roles, i.e. system administrators.2. An admin is the operator of all clusters by default, i.e. an admin can manage all clusters. 3. Displayed in the cluster member list by default. An owner cannot remove an admin unless the admin is converted to user, and the system will automatically remove the admin from the cluster member list. |
| user | 1. Has read-only permissions for the system dimension. 2. After an admin creates a new account with the user role, the user account cannot view any clusters if the corresponding cluster is not assigned to the account. 3. Can create clusters and become the owner of the clusters. |
1. General role. 2. There can be multiple user roles. |
Cluster roles:
| Roles | Permission | Description |
|---|---|---|
operator |
1. Scale clusters. 2. Set cluster alerts. 3. Manage cluster nodes. 4. Manage cluster services. |
1. The cluster operator. 2. There can be multiple operator roles in a cluster. |
owner |
1. Have all the permissions of operator. 2. Unbind and delete clusters. 3. Add and remove accounts with operator roles. 4. Transfer the owner role. |
1. The cluster owner. 2. There can only be one owner in a cluster. |
Create accounts
Accounts with admin roles can create other accounts. The steps are as follows:
- At the top navigation bar of the Dashboard Enterprise Edition page, click Authority, and click Create.
-
Select one method and input information to create an account, and click OK.
-
Invite: Set the invitee's enterprise email and role. After the invitee clicks the Accept button in the email to activate the account, the invitee needs to click Login to automatically jump to the Dashboard Enterprise Edition login page. The invitee can log into Dashboard with his/her enterprise email account and password.
Note
When selecting the Invite method to add accounts, ensure that the invitee's email has been added to the enterprise LDAP server.
- Create Account: Set the login name, password, and role for the new account. For information about roles, Account roles.
-
View accounts
The created accounts are displayed on the Authority page.
-
You can view the username, account type, role, associated cluster, and create time of accounts.
- Account Type: Includes platform and ldap. platform is a general account and ldap is an LDAP account.
- Role: Displays the role of an account, including admin and user. For more information about roles, see the above content.
- Associated Clusters: Displays all the clusters that can be operated by an account. If the cluster was created by the account, the associated cluster has the
ownertag.
- You can search for accounts in the search box, and filter accounts by selecting an associated cluster.
Other operations
- In the Action column on the Authority page, click
 to edit account information.
- In the Action column on the Authority page, click
 to delete an account.