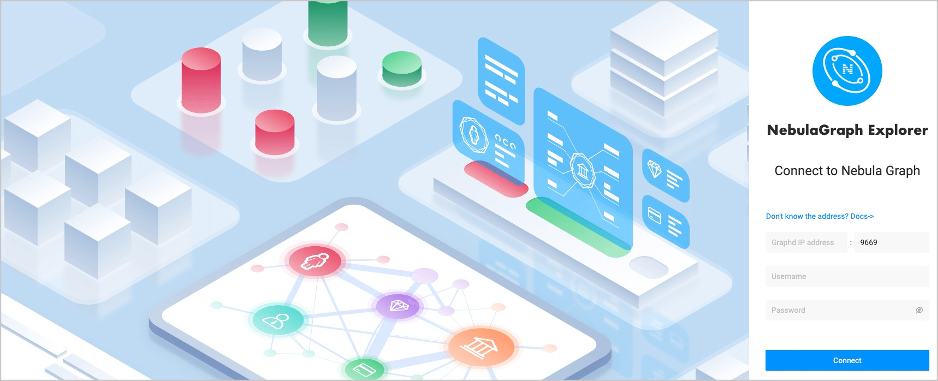
Connect to NebulaGraph
After successfully launching Explorer, you need to configure to connect to NebulaGraph. You can connect directly to NebulaGraph by default. To ensure data security, OAuth2.0 authentication is also supported. You can connect to NebulaGraph only after the authentication is passed.
Prerequisites
Before connecting to the NebulaGraph database, you need to confirm the following information:
- The NebulaGraph services and Explorer are started. For more information, see Deploy Explorer.
- You have the local IP address and the port used by the Graph service of NebulaGraph. The default port is
9669.
- You have a NebulaGraph account and its password.
- We recommend you to use the Chrome browser of the version above 89. Otherwise, there may be compatibility issues.
OAuth2.0 Configuration
Caution
The feature is still in beta. It will continue to be optimized.
Note
If you want to connect directly to NebulaGraph, see Procedure below.
To enable OAuth2.0 authentication, modify the configuration file in the Explorer installation directory. The path is config/app-config.yaml.
The descriptions of the OAuth configuration are as follows.
| Parameter | Example | Description |
|---|---|---|
Enable |
false |
Enable or disable OAuth2.0 authentication. |
ClientID |
4953xxx-mmnoge13xx.apps.googleusercontent.com |
The application's ClientId. |
ClientSecret |
GOCxxx-xaytomFexxx |
The application's ClientSecret. |
RedirectURL |
http://dashboard.vesoft-inc.com/login |
The URL that redirects to Dashboard. |
AuthURL |
https://accounts.google.com/o/oauth2/auth |
The URL used for authentication. |
TokenURL |
https://oauth2.googleapis.com/token |
The URL used to get the access_token. |
UserInfoURL |
https://www.googleapis.com/oauth2/v1/userinfo |
The URL used to get the user information. |
UsernameKey |
email |
The key of the user name. |
Organization |
vesoft company |
The organization name. |
TokenName |
oauth_token |
The name of the token in the cookie. |
Scope |
email |
Scope of OAuth permissions. The scope of permissions needs to be a subset of the scope configured by the vendor's OAuth2.0 platform, otherwise, the request will fail. Make sure the UsernameKey is accessible within the requested scope. |
AvatarKey |
picture |
The key of the avatar in the user information. |
After the configuration is complete, restart the Explorer service. The OAuth authentication is displayed on the login page. You can continue to connect to NebulaGraph only after the authentication is passed.
Procedure
To connect Explorer to NebulaGraph, follow these steps:
-
Type
http://<ip_address>:7002in the address bar of your browser.The following login page shows that Explorer is successfully connected to NebulaGraph.

Note
When logging into NebulaGraph Explorer for the first time, the content of END USER LICENSE AGREEMENT is displayed on the login page. Please read it and then click I agree.
-
On the Config Server page of Explorer, configure these fields:
-
Graphd IP address: Enter the IP address of the Graph service of NebulaGraph. For example,
192.168.10.100.Note
- When NebulaGraph and Explorer are deployed on the same machine, you must enter the IP address of the machine, instead of
127.0.0.1orlocalhost. - When connecting a NebulaGraph database on a new tab, The new session will overwrite the sessions of the old TAB. If you need to log in to multiple NebulaGraph databases at the same time, you can use different browsers or non-trace mode.
- When NebulaGraph and Explorer are deployed on the same machine, you must enter the IP address of the machine, instead of
- Port: The port of the Graph service. The default port is
9669.
-
Username and Password: Fill in the log in account according to the authentication settings of NebulaGraph.
- If authentication is not enabled, you can use
rootand any password as the username and its password.
- If authentication is enabled and no account information has been created, you can only log in as GOD role and use
rootandnebulaas the username and its password.
- If authentication is enabled and different users are created and assigned roles, users in different roles log in with their accounts and passwords.
- If authentication is not enabled, you can use
-
-
After the configuration, click the Login button.
Note
One session continues for up to 30 minutes. If you do not operate Explorer within 30 minutes, the active session will time out and you must connect to NebulaGraph again.
A welcome page is displayed on the first login, showing the relevant functions according to the usage process, and the test datasets can be automatically downloaded and imported.
To visit the welcome page, click  -> Beginner's Guide.
Clear connection
When Explorer is still connected to a NebulaGraph database, on the upper right corner of the page, select  > Clear Connect.
After that, if the configuration database page is displayed on the browser, it means that Explorer has successfully disconnected from the NebulaGraph.